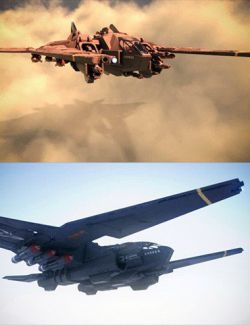
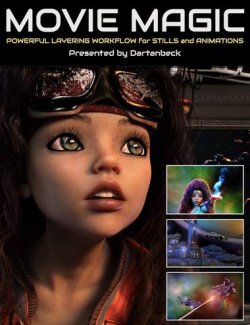
Making of: 'The Raptors' in DAZ Studio preview image 0Making of: 'The Raptors' in DAZ Studio preview image 1Making of: 'The Raptors' in DAZ Studio preview image 2Making of: 'The Raptors' in DAZ Studio preview image 3Making of: 'The Raptors' in DAZ Studio preview image 4
Learn how you can design & light this image in DAZ Studio using multiple layers and post work in Photoshop.
Every single step and mistake taken is exposed during this 55 minute long Quicktime (.MOV) video tutorial!
For the first time ever this video is now available to the public! Previously only available to subscribers of the Dreamlight Exclusive Members Club.
Dreamlight Website
- Notes
-
- There are 10 .MOV Tutorials in 5 separate downloads for this product.
- Quicktime or other .MOV compatible player required to view the video
- To follow these Tutorials Exactly, you will need the following items
-
- DAZ Studio
- Allosaurus
- Mood Master DS Z-Depth FX Layers
- Studio Light Pro for DS or Studio Light LE
- The Tin Can
- Photoshop 6+, GIMP or other layer compatible graphics editor
- Compatible 3D Figures
- N/A
- Compatible 3D Software
- DAZ Studio
- What's Included & Features
-
- Learn How To:
- Set the Render Settings
- Load the Prop and Place the Camera and Why
- Add the Characters, Resize Them and Move Them
- Add Main, Side and Back-Lights Using Studio Light Pro
- Add Additional Standard Spot Light and Play With the Shadows
- Create Rim/Contour Light Effect Around the Characters
- Render Each Light In A Separate Layer and Why This Is So Useful
- Add Led Light Effects
- Use Mood Master to Add Z-Depth Effect and Fog / Rain
- Post work the Entire Image, From Loading Every Layer - to the Final Image
- Experience Every mistake Taken - and How to Correct Them
- Quicktime Format (.MOV)
- 900 X 700 Pixels
- 5-7 Frames Per Second
- 252 Mb File Size In 10 .MOV Parts
- Learn How To:
Daz3d
Where to buy:
https://www.daz3d.com/making-of-the-raptors-in-daz-studio