ITF Dev Kit for Genesis 8 Female by InTheFlesh
A collection of useful tools to speed up your workflow when creating content for Genesis 8 Female.
Make sure watch the tutorial on Youtube for a full walkthough of all the tools:
Created in Daz Studio Pro 4.11
__________________________________
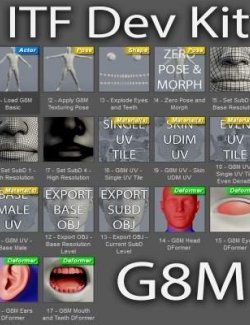
Once installed, you will find the ITF Dev Kit folder under People -> Genesis 8 Female -> ITF Dev Kit.
1. Load G8F Basic loads Genesis 8 Female at Subdivision Level 1 with a grey Iray shader I use for test renders. The eyelashes have been removed and the Maximum Subdivision Level has been unlocked to level 4.
2. Apply G8F Texturing Pose is a custom pose to allow for easier texturing. The fingers and toes have been spread apart and straightened, the legs are spread apart for increased access and the arms have been raised and straightened. I tend to texture the eyes and mouth separately, so the mouth is partially opened to reduce texture distortion when compared to having the mouth fully open but still allowing you to get and and texture the lips. The eyes are also mostly closed to give better access to the eyelids. You may need to make some adjustments when working with more extreme character morphs, so just go to Currently Used under parameters to tweak the eye and mouth opening.
3. Explode Eyes and Teeth is a custom morph that moves the eye and teeth geometry out to the left of Genesis 8 Females head. The sclera, pupil and iris have been separated from the cornea and eye moisture. The teeth have been aligned and spread out for easier access during texturing. This morph is also useful for extracting texture maps because it reduces overlapping areas of the mesh.
4. Zero Pose and Morph simply does as stated: it restores the default Genesis 8 Female pose and removes the Explode Eyes and Teeth Morph.
5. Set SubD Zero, One and Four are one click options to set your desired Subdivision level without having to drill into the Parameters.
6. Single UV Tile is a custom UV set that moves all the UV shells into a single non-overlapping layout. It is optimized for texture painting and baking in applications that don't support multiple UDIM tiles. Again, I usually texture the eyes and mouth separately so the UV's for those parts have been scaled down and placed into blank areas of the Torso and Legs UV's. If you use this UV set, you can convert the created textures to be compatible with the default Base Female UV Set by cropping them into 4 equal square textures.
7. Skin UDIM UV is similar to the Single UV Tile in that the eye and mouth uv's have been scaled down and placed into blank areas of the Torso UV's. But instead of the UV's being on a single tile, the Face, Torso, Legs and Arms UV's are still in their original UDIM tile locations. This layout is my preference when working in Mudbox because it supports full UDIM texture painting and baking. Nothing needs to be done to the textures using this UV set to be compatible with the default Base Female UV's, but you can paint out the eye and mouth textures if you'd like.
8. Single UV Tile Even Density is a custom UV set that moves all the UV shells into a single non-overlapping uv tile while scaling the parts to ensure even pixel density across the surface. This is especially useful when projecting full body photographs or extracting texture maps to reduce seams due to differences in UV scale. For example, the difference in pixel size between the face and torso textures. This UV set is also good for using tileable or procedural textures with consistent detail resolution across the mesh. The downside to this UV Set is that if you want to make the textures compatible with the Base Female UV Set you will need to project the textures which can result in a loss of fidelity. I'd recommend baking 16K maps if your hardware can handle it when using this UV Set.
9. Base Female UV simply restores the default Genesis 8 Base Male UV Set.
10. Export Base OBJ changes the selected figure to Base Resolution 0 and SubD 0 and prompts for a location to save an OBJ file. The settings used are designed for exporting to Mudbox and Maya, but may work with others.
11. Export SubD OBJ exports the selected figure at the currently set Resolution and SubD Level. Again, it prompts for the save location and uses the same settings as before.
12. Head, Eyes, Ears and Mouth DFormers load preset weight-mapped D-Formers. These are mostly used when importing morphs to define which parts get morphed or not. The Head D-Former has a soft falloff and can be used to split head and body morphs into separate parts. The Eyes D-Former can be used to ensure the eyes aren't affect by imported morphs. This has no falloff, so only the eye geometry is affected while the eye socket is still morphed. The Ears D-Former has a soft falloff, and the Mouth and Teeth D-Former also has a slight falloff for a smoother blend between the mouth and lips. By default, the imported morphs will be applied to the selected area. To prevent morphs from being applied to the D-Former selection, just set the Strength to minus one in the Attenuate By options.

