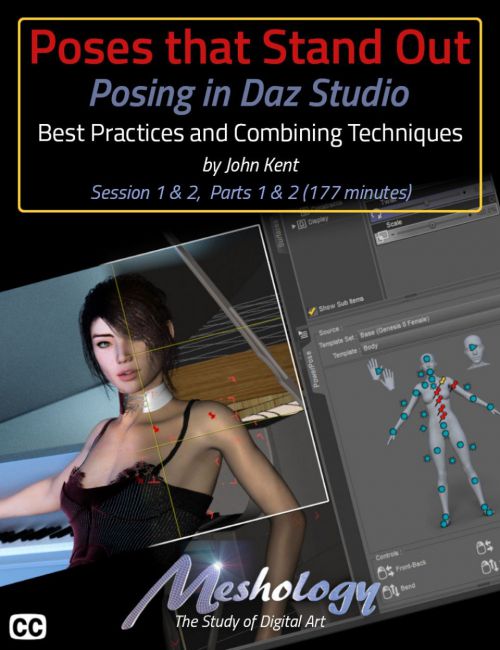
New to Daz Studio or a combat veteran? We'll bet you didn't know there was a full three hours of content just on how to use the posing tools in Daz Studio. We were surprised too, and the revelations will change the way you pose, forever!
Okay, so get your counting fingers ready...
- Changing a bones parameters directly... okay... okay... that's a no-brainer. Everybody knows that one.
- Inverse Kinematics, in other words, dragging a part of the body to the position you want in the viewport, while the rest of the body kind'a follows along.
- Using Inverse Kinematics with the Universal Tool... the right way!
- Using Inverse Kinematics with the Action Pose Tool... the better way!
- Using Power Pose with Inverse Kinematics and the Universal Tool.
- Using Power Pose by itself with the Action Pose Tool.
- Using Pose Controls, a subset of the Parameters Pane... bit it's really different.
- Using the Shaping menu... technically not posing, but if it affects the shape, then realistically, yes, it's posing.
Eight! Eight different ways to pose figures in Daz Studio. All with their little quirks. All that are strong in a particular part of the body. And the best part... you can mix and match the methods to find a procedure that works best for you!
- Oh yeah, I just remembered, there's another way to pose in Daz Studio, and that's using the Pose Gismo. There are literally so many ways to pose in Daz it's hard to know when to use what! No wonder beginners are overwhelmed and confused.
John Kent methodically explains them all before bringing them all together, like a giant symphony, to demonstrate how they can all be used in concert with each other. How they can be used to speed up your workflow giving your figure a more realistic pose. For example, did you know that Daz Studio has two different kinds of pins for the body? Yep, you heard right. Two!
One called the Universal Pin, because it's applied using the... you guessed it... the Universal Tool. The other is called the Action Pose Pin. Anyone? Hands! Anyone? Yes, the lady down in front. That's right. It's applied with the Action Pose Tool.Think they do the same? You'd be wrong. John explains what each does and how best to utilize this powerful feature that is often overlooked or complete misunderstood. Even by the pros!
- Oh, I also forgot that John as a trick for extracting partial poses from full poses. What are we at now? Ten different ways to pose in Daz Studio.
And if you think this product description has a bit of attitude, you'd be right and that's because after we learn about the tools for posing, we delve into what makes the pose realistic and Attitude would be right at the top. If your character doesn't exude attitude, then you've missed your mark. And it's the little things that count... well, unless you're still counting ways to pose in Daz Studio.
Oh, and we haven't forgotten camera angle and focal length... well, we've packed so much information into this tutorial that we'd be wasting your time trying to enumerate it all in this description. Suffice it to say that this is THE Posing Tutorial for beginners and seasoned veterans alike.
We're positive that you'll learn a new way to pose that you never new existed in Daz Studio but don't take our word for it. Watch our video teaser here...
About the Presenter - John Kent
I'm a self-taught digital artist with a background in software tools and hobbyist photography. These two worlds came together when I discovered 3D composition and rendering environments – particularly Daz Studio with the Octane Render plug-in. With these tools I can exploit light, shape and texture to build scenes that would be almost impossible for me to stage using real-world photography, rapidly iterating from initial visual sketches to compelling photorealistic art. I also enjoy teaching and mentoring others, so I'm glad to work with Meshology to help other artists develop and render their own digital visions.
This tutorial is professionally edited and indexed for random access as well as closed-captioned in English
This tutorial includes a PDF index with time code references for the User's own notes.
What's Included and Features
- Poses That Stand Out
- Total Running Time: 177 minutes
- Session 1 Daz Studio Tools for Posing
- Overview of the Tutorial
- Configuring the Daz Studio Workspace to Facilitate Posing
- Why Create you Own Poses?
- A Graphic Representation of the Posing Workspace
- Why John Doesn't Load the Pose Pane
- Examining the Genesis 8 Bone Structure
- The Daz Studio Viewport Controls
- Tip: Create a Render Cam
- The Daz Studio Tools Menu
- How to Create a Pose
- Manual Editing of the Bone Parameters
- Making a Simple Running Pose
- Explanation of the Pose Gismo, Limits and the Reset Icon
- Bone Movement Limits, Why the Exist
- When and Why to Exceed Bone Limitations?
- An Example of a Pose that Exceed Bone Limitations
- Moving Multiple Bones Simultaneously
- Zeroing the Figure Pose
- Keyboard Shortcut for Zeroing the Figure Pose
- Collapsing the Scene Pane to Work with the Most Used Bones
- Basic Figure Bone Differences
- Fixing Poses between G3 and G8
- Posing the Arm
- Creating the "Rub your Belly and Rub your Head" Pose
- "You" are Your Own Best Model
- Creating Character Attitude
- Considering the Camera Angle and the Focal Length
- Giving the Spine a More Feminine Curve
- Bringing the Pose to Life
- Tweaking the Head
- The Key to Creating Believable Poses
- Another Way of Pointing the Eyes
- Creating a Null
- Parenting the Eyes to the Camera
- Inverse Kinematics
- Inverse Kinematics and the Universal Tool
- Inverse Kinematics Activates the Necessary Bones During Posing
- The Universal Pin (Purple Pin)
- Inverse Kinematics and the Active Pose Tool
- The Active Pose Tool Setting Pane
- The Active Pose Pin (Red Pin)
- The Differences Between the Two Pinning Types
- How To Effectively Using Pinning
- Don't Use the Universal Tool with the Active Pose Pins
- Rotate the Figure for Better Control When Mouse Posing
- Translating in Active Pose
- Turning Off Active Pose Pins
- Using Power Pose Effectively
- Undoing a Power Pose Movement
- Selecting Bone Groups with Power Pose
- Using Power Pose with the Universal Tool, it's Strengths
- Pinning in Power Pose (both kinds with one tool)
- Graphic Clarification for Pinning in Power Pose with Universal Tool
- Power Pose - Changing Body Templates
- Uses for Power Pose
- Power Pose Seems to work Best with G8 Figures
- Creating Your Own Posing System
- Daz Studio Pose Controls
- "Canned" Hand Poses
- "Canned" Facial Expressions
- Changing Body Shapes
- Changing Body Types
- Recommendation: Always Set the Figure Shape Before Posing
- Session Review
- Product Used
- Credits
- Session 2 Part 1 - Two Figure Studies
- First Study: The Yoga Pose Overview
- Always Consider Weight Distribution
- Rule of Thirds Guides in the Viewport
- Remember: Frame using the Render Cam
- Always Start Posing from the Core Out
- Pose using the Perspective Cam
- Fixing the Figure "in" the Ground
- Observe your Figure from Below the Ground for Contact
- Tweak the Foot for a More Natural Stance
- Why do we Intersect the Ground At All?
- How to Create a Primitive for a Floor
- Posing the Left Thigh
- Be Sure to Examine Your Reference Images in Detail
- Now Work towards the Upper Body
- Adding and Arch to the Back
- Back: Before and After
- Posing the Arms
- Critiquing the Rough Pose
- Pose Controls: Facial Expressions
- Pose Controls: Giving the Hands Life
- Tweaking the Arm Positions
- Watch for Intersecting Body Parts
- Examining the Calf Squish
- Commercial "Squish" Morphs
- Issues with the Calf and Thigh
- Dynamics of the Image as regarding the Rule of Thirds
- Second Study: Fitness Overview
- How Camera Focal Length Affects the Composition
- Always consider the Focal Length in the Composition
- Core Rule: Start with the Pelvis
- Apply a Little Twist to All the Bones
- Posing the Arms
- Posing the Hands with Props
- Parenting the Prop
- Posing the Fingers Around the Prop
- Using Power Pose on the Hands
- Posing the Thumb
- Enhancing Muscle Tone for Weight
- Changing the Body Tone in the Shaping Pane
- Final Fitness Scene Details
- Produces Used
- Credits
- Session 2 Part 2 - Third Figure Study, The Devil's in the Details
- Third Figure Study: Elegance Overview
- Combining all the Posing Techniques into a Single Scene
- As Before, Work from the Core Out
- The Disadvantage of Rotating the Entire Figure (moves from the Feet)
- A Better Way To Rotate, From the Core, in this case, the Hip
- Active Pose Pinning in Action
- Active Pose: Start with the Right Leg
- Parameters: Fixing the Right Heel
- Active Pose: Focus on the Left Leg Now
- Parameters: Focus on the Upper Body
- Parameters: Arching her Back
- Parameters: Work up the Spine
- Active Pose Translate Gizmo: Position the Right Arm
- Power Pose: Finessing the Fingers
- Active Pose Parameters: Posing the Left Arm
- Power Pose: Posing the Left Hand
- Translate Gizmo: Moving the Prop to Accommodate the Pose
- Power Pose: Remember, the Thumb is Weightbearing
- Parameters: Pose the Head Last
- Parameters: Make sure the Eyes Look at the Camera
- Completed Pose in Just under 30 Minutes
- Saving Poses
- Using a Saved Pose
- What is a Hierarchical Pose Preset?
- Saving a Partial Pose
- Loading a Partial Pose from a Full Pose
- Reinforcement of What Makes a Great Pose
- Wrap up
- Products Used
- Credits
Compatible Software:
Daz Studio 4.12
Install Types:
DIM, Manual Install
