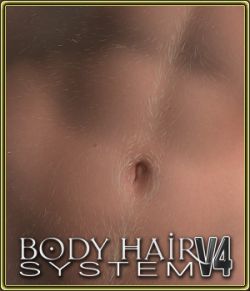
This system works just like clothing. Simply add to G3 and it will auto conform, change color and thickness as required.
Lower arm, upper arm, abdomen, neck, chest, back, hips & thighs, shins, armpits and pubic hair all are separate parts so you can load all or only the ones you want to render.
Some parts like lower arm hair come in different versions for shorter or sparser hair.
Other parts have different options for thickness or thinness so you can adjust depending on how far away is your charcter.
Increase thickness for characters farther from camera, decrease thickness for closeups.
A special method I use to get precise control over where I want hair or not is to render 2 versions of the same image, one with hair and one without, then use Gimp or Photoshop to add the image with hair on top of the image without and use the eraser at 50% or so to blend or erase the appearance of hair where I want. Fast and easy and you get incredible results.
Special advice is to render regions to adjust hair thickness and color before rendering a whole image, this will save you a lot of time setting up the hair for your characters.
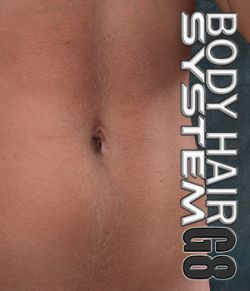
This product brings "body hair" to Genesis 3 Females and derivatives. It uses actual geometry for each hair instead of opacity planes, which makes the hair look more realistic.
Hair will autoconform and is compatible with all Genesis 3 Female Base morphs and Victoria 7. For any other morph products simply use the transfer utility in DAZ Studio 4.8+
Use the FBMExpandAll morph to adjust the hair to be closer or separate from the skin.
About Materials:
Materials are separated for Pubic Hair and Body Hair. Materials come in both 3Delight and Iray versions.
Changing and making your own materials is extremely easy, simply go to the material editor and change the diffuse and specular colors, no texture maps to load or anything only simple colors, so if you want blue or green hairs it's easy to do in seconds.
About Morphs:
Some parts have special morphs to change hair thickness. Some parts have thickness and thinness dials. Use these to adjust the appearance of hair when rendering full body size or closeups. The abdomen is a special case and has thickness and thinness dials for special parts within the abdomen, so you can control the middle trail of hairs that run from the pubic area to the navel and upwards, the tummy area, the abs area and the sides area separately.
When using the thickness dials it's advised to use decimals. 0.3 to 0.6 should generally add enough thickness while -0.2 should make hairs thinner in cases where there is no thinness dial. Of course you should experiment and see what best suits your particular needs.
Various TIPS:
When preparing to render, it's always the best idea to start rendering regions of your scene/character to make sure the thickness and color are correct for that part, this will always save you a lot of time.
To have precise control over the hair in your characters it is advised to make 2 separate renders of the same scene/character, one with hair and one without hair. Then in Photoshop or a similar image editor, load the two images as layers, with the one with hair on top of the one without. Then use the erase brush/tool at 50% or so, to blend or erase hair in the parts that you want.
Software: Daz Studio 4
Base Figures: Genesis 3 Female