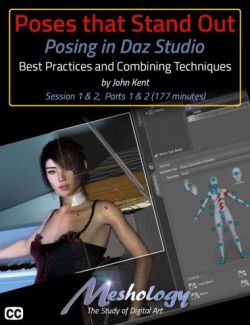
Fueling Your Renders with Octane is a two part tutorial with a total running time of about 104 minutes. John Kent, who has been a Daz Studio Octane plugin user and real-world photographer, takes the student from simple to more and more complex scenes cohesively building on previous knowledge.
If you are an artist looking for photorealism, this is the tutorial for you!
For those of you that are unaware, the Daz Studio Octane plugin is a unique and powerful render plugin that is used by many of the major players in the entertainment industry because its ability to work within a variety of platforms that include Cinema 4D, 3ds Max, AutoCAD, Blender and Lightwave to name just a few.
The strength of Octane is the ease with which it mimics real-world photographic and cinematic terminology, which means that anyone that understand these real-world disciplines can easily utilize their knowledge to make use of Octane to create very realistic renders. This, coupled with the massive photorealistic texture library that is available to anyone with the plugin, creates one of the best render engines on the market.
John starts by opening a single scene in Daz Studio and then by making changes mostly in Octane he demonstrates how the user can see changes, virtually immediately.
He starts with an Out of the Box render, without any changes for a baseline for comparison.
Then, we add an HDRI image for lighting and adjust the angle of the sun in real time, as well as adding an Octane camera, also making adjustments to the camera, just as a real-world photographer would.
Then we examine the massive photorealistic material library that comes with Octane, its real strength. In a few short moments, we’ve transformed the Daz scene into something completely different from what the out of the box render looked like.
Next, we add a couple of primitive spheres in the Daz scene to act as emissive light sources in Octane, and here it’s worth pointing out that these are the ONLY changes that we make to the Daz scene actually IN Daz.
Tweaking the lights, refining the intensity, position, color… as John says, “lighting can make or break a scene. You’ll either believe it’s real, or not.”
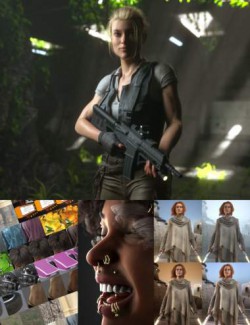
At this point, we’ve replaced the Daz Vendor supplied materials. It’s at this point that we bring them back. Starting with a simple explanation of node editing and then building on it, piece by piece. What ends up looking like a spaghetti map, is totally legible, but better: logical. The viewer will understand why and how John adapted the nodes and maps. And, he modifies the hem of the dress to make it appear more ragged or torn… all in Octane!
To finish up, we cover post processing in Octane. Lighting tweaks, special effects, twinkles, the possibilities are endless.
So, if you want your renders to look more photorealistic, we highly recommend checking out Otoy’s Daz Octane plugin and tutorial. If you want a brief peek at what's in the tutorial, you can take a look at our teaser here.
What's Included and Features
- Fueling Your Renders with Octane - Photorealistic Renders
- Total running time: 104 minutes
- Part 1
- Where to buy the plugin
- The Daz scene used for all the renders
- Octane running in Daz Studio
- First look at Octane Viewport running in Daz Studio in Realtime
- Out of the Box, Octane Render
- HDRI Lighting added to the scene
- Using Octane's massive materials library
- Using real-world photo techniques in creating renders
- Modifying Daz Outfits
- Real-time Post-Processing effects
- Octane Basics
- Basic Settings
- John's GPU Configuration
- Octane's Sun Lighting Model (out of the box)
- HDRI Lighting
- The Importance of, and Changing the White Balance
- Hint: Toggle the Icons in the Viewport
- Using Different HDRI Files
- Controlling HDRI Brightness
- Creating a Dedicated Camera for Octane
- Adjusting the Depth-of-Field with the F-Stop
- Changing the Octane Render Engine
- Octane Materials Library
- Applying an Octane Material
- Returning to Daz Materials (in Octane)
- CAUTION: There is no 'undo' in Octane
- Fixing Loss of Detail
- DPI of the render and How to Adjust for different media
- Scaling and Adjusting Textures
- Part 2
- Creating Different Instances of Materials (benefits)
- Changing the Lighting
- Creating Emissive Primitives in Daz Studio
- Using the Daz Studio 'View Frame' feature
- Adding a second Emitter
- Material Editing
- Creating a Blank Material
- The Node Graph Editor
- Bringing back Vendor Details
- Tearing the Dress in Photoshop
- Octane can Read Native Photoshop PSD Files
- A Better Option for Transparency
- Emissive Lace
- Modifying the Veil on the Floor
- Editing Objects in Octane
- Creating Materials as a Utility
- Copy to Presets
- Post Processing in Octane
- Film Types and Speeds
- Changing the Vignette
- Adding Glare and Effects
- A Brief Recap
- The Normal Map will have Precedence over the Bump Map
- This tutorial is professionally edited and indexed for random access
- This tutorial includes a PDF index with time code references for the User's own notes.
Compatible Software:
DAZ Studio 4.10
Install Types:
Install Manager, Manual Install