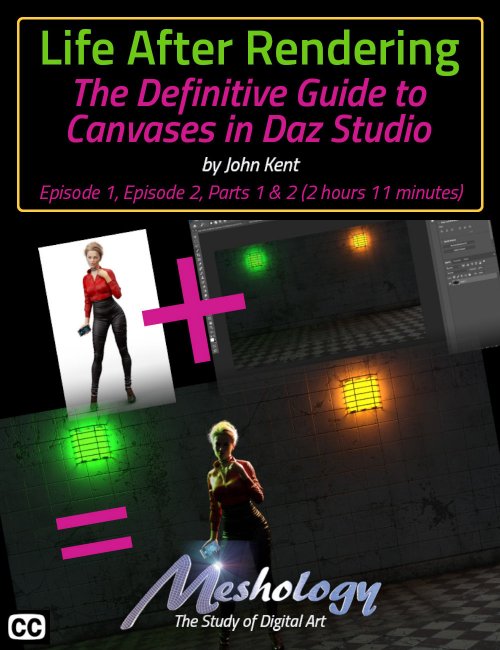
In Life After Rendering, we demonstrate how to use a little-known element of Daz Studio. Canvases.
Canvases are to digital art, what layers are to a digital illustration or picture, and the best part? You only need to render your image once and then you can change the light intensities in Post-Production, whether you're using Photoshop or GIMP, or some other photo processing app. Wait? What? Did you say, render the image a single time and THEN change the intensities?
Yep. That's the power of DS Canvases.
Everyone knows that the key to any good render is lighting, but in the digital world, like in the real world, playing with light intensities is quite possibly the most important step. The problem then is time and the power of your computer. For those that have a less-than-powerful supercomputer, Canvases are going to be your best friend.
John demonstrates that with a little forethought and a change in the typical workflow, you can create multiple different moods in a scene from a single render, and the best part… you only need to position your lights and then crank the intensities all the way up. No fiddling with the 'perfect' light intensity, or even colors for that matter! That's all handled in the post-processing procedure.
But it's not just light intensities, you can also pull focus. What do we mean by that? Well, imagine that you have three figures in your scene, all at different distances from the camera. One in the back, one in the middle, and one close to the front.
The usual method would be to choose your focal point in DS and then turn on Depth of Field, adjust and render. The problem then is that if you want a softer DOF or a different focal point, say the person in the back instead of the front as you rendered it, you have to change the DOF and render again.
However, using Canvases, there is no need for that. No need to turn DOF on at all. Huh? That's right. Don't touch that dial. Just render the scene in Canvases and you'll discover that one of the canvases is a DOF canvas… a canvas that can be used to do exactly what I just mentioned but in POST PROCESSING! No additional render required. Want to change the focal point? It's a simple click and it's done… IN SECONDS!
For anyone that wants to play around with their scene lighting and focus AFTER RENDERING, this tutorial will most definitely give your scene Life After Rendering.
We're positive that you'll easily adapt to a new method of Rendering and feeding it into your post-production workflow but don't take our word for it. Watch our video teaser:
About the Presenter - John Kent
I'm a self-taught digital artist with a background in software tools and hobbyist photography. These two worlds came together when I discovered 3D composition and rendering environments – particularly Daz Studio with the Octane Render plug-in.
With these tools I can exploit light, shape, and texture to build scenes that would be almost impossible for me to stage using real-world photography, rapidly iterating from initial visual sketches to compelling photorealistic art.
I also enjoy teaching and mentoring others, so I'm glad to work with Meshology to help other artists develop and render their own digital visions.
This tutorial is professionally edited and indexed for random access and Closed Captioned in English
This tutorial includes a PDF index with time code references for the User's own notes.
What's Included and Features
- Life After Rendering - The Definitive Guide to Daz Studio Canvases
- Video 1: What, Exactly, Is a DS Canvas: 48:18 minutes (.MP4)
- 00:00 Introduction
- 03:36 Example of Canvases in Use
- 05:27 An example of creating depth of field in Photoshop, with No DOF turned on in DS
- 05:54 Using Adobe Bridge to see the 32-bit .EXR files
- 06:49 What is an .EXR file
- 08:39 Tradeoffs when using 32-bit files versus 16 or 8-bit files
- 11:31 Using the DOF Canvas to create Depth of Field in Photoshop
- 14:07 How to Create Canvases in Daz Studio
- 16:44 Subtle Changes in Daz Studio v.20 and earlier versions
- 18:52 Different Way of Thinking about a Scene in Daz Studio
- 19:33 Turning the Lighting Way Up!
- 20:49 Changing the Environmental Intensity
- 23:32 Changing the Tone Mapping Settings for Canvas Renders
- 25:38 Changing the “Save File” Location
- 26:45 Turning Render Canvases On
- 27:15 Creating Canvases
- 28:59 Creating a Node Group
- 34:52 Results of the Canvas Renders
- 35:30 Loading the Canvases into Photoshop
- 36:48 Adding and Exposure Layer in Photoshop
- 37:48 Changing the Blending Mode on Layers in Photoshop
- 38:41 Changing the Light Intensities in Photoshop
- 41:09 Limitations of Using 32-bit files in Photoshop
- 47:34 Products used in Episode 1
- Video 2 Part 1: The Power of Canvases: 38:18 minutes (.MP4)
- 00:00 Introduction
- 01:47 Problems using EXR Files in post-processing
- 02:47 Summary of Setting up the Workspace
- 04:10 The Demo Scene
- 08:41 The Scene in Iray, All Lights turned On
- 10:10 The Tone Mapping Settings
- 16:52 The Problems with Exposure Adjustment
- 18:22 Complications When Using 32-bit Files
- 18:50 The Environment Canvas
- 19:10 Converting 32-bit to 16 or 8-bit Files
- 19:32 Why Merge Layers into a Single Layer
- 19:47 HDR Tone Dialogue (in Photoshop)
- 20:39 Exposure and Gamma Settings used for the Demo
- 21:22 Local Adaptation Options
- 22:52 Similar to Processing an HDR image from a Camera
- 23:37 The 1st Canvas in Photoshop
- 24:35 A Problem with the HDR Toning
- 27:14 The Light Canvases Used
- 28:13 Shadows
- 28:34 Changing the Blending Modes in Photoshop’s Layers
- 31:12 Problems when Importing the Images into Photoshop as a Stack
- 32:14 Layer Order
- 33:54 Using Different Blending Options
- 35:47 Attempting to Compensate for a White Background
- 37:29 Products Used in Episode 2
- Video 2 Part 2 : Available Canvases : 45:23 minutes (.MP4)
- 00:00 Introduction
- 01:00 The Beauty Canvas
- 01:45 The Alpha Canvas
- 03:40 The Normal Canvas
- 05:09 The Distance Canvas
- 06:09 The Depth Canvas
- 06:29 The Material ID Canvas
- 09:24 Setting a Material ID in Daz Studio
- 10:21 Black Material IDs do not Export in the Canvas
- 11:17 Line Render 9000 Scripts for Setting Material IDs NOTE: THESE SCRIPTS ARE ONLY AVAILABLE WITH THE LINE RENDER 9000 TUTORIAL SESSION 1. THE LINE RENDER 9000 PLUGIN IS NOT REQUIRED FOR THEM TO WORK
- 12:27 Extract from Line Render 9000 Tutorial, Session 1
- 14:22 The Diffuse Canvas
- 15:06 The Glossy Canvas
- 15:59 The Specular Canvas
- 16:50 The Emissive Canvas
- 17:44 The Light Path Expression (LPE) Canvas and a hyperlink to online Documentation
- 18:37 Compositing a Different Background with Daz Studio Canvases in Photoshop
- 19:28 The Rear Left High Light Canvas
- 19:36 The Rear Right High Light Canvas
- 19:43 Using the Environmental Fill Canvas for Fill Light
- 19:52 Using the Emissive Canvas for the Light from her phone
- 20:26 How to Import another Canvas after previous Canvases have been moved/resized
- 21:15 Changing the Light Intensities
- 22:23 Changing the Light Colors to match the Lights in the Background Image
- 26:12 Compositing Canvases into a Bright Scene
- 28:31 Problems with the Ground On in Daz Studio
- 30:09 Creating a Shadow in Photoshop
- 31:18 Turning the Ground Off in Daz Studio
- 44:39 Products Used in Episode 2
- Documentation: (.PDF)
- Life After Rendering - Index
Compatible Software:
Daz Studio 4.21
Install Types:
DazCentral, DIM, Manual Install
