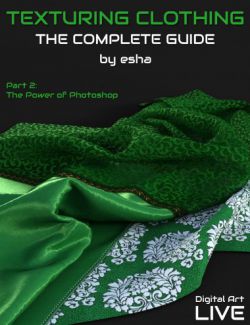
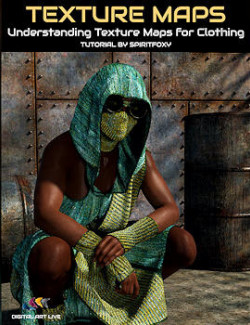
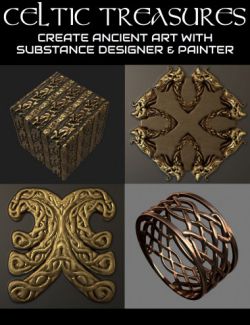
Texture mapping is more than “icing on the cake” for your clothing or props since it can make or break 3D models. You can have a well-defined and accurate model, but average or poor texturing negates the value of these assets, making them more difficult to sell or use in a render.
Luckily, tools for texturing have improved and provide that all-important photorealistic look, BUT only once you've learned the software and figured out an efficient and complete workflow — essential for DAZ Studio content creators.
Are you in one or more of these situations?
- I don't know where to begin when using realistic textures for clothing or props.
- I'm challenged with creating seamless patterns.
- I want to learn how to create professional-level texturing with modern tools, but I'm unsure how to use them efficiently.
Professional Texturing Is Attainable!
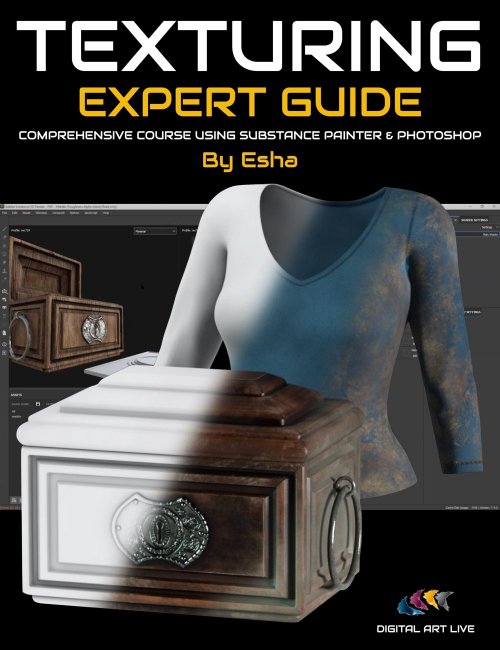
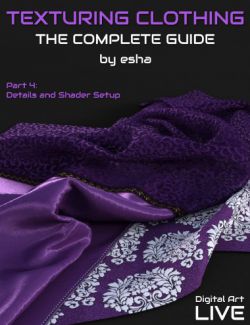
In this tutorial course, Sabine Hajostek (Esha), one of the leading published artists at Daz 3D, provides a complete guide to texturing clothing and props using Substance Painter and Photoshop so that you can:
- Use realistic textures reflecting real-world material properties
- Train your eyes to notice and build detailing
- Bring unique texture ideas to the market
- Show you a streamlined modern workflow for increased productivity
Esha will show you how to texture clothing or props to a professional level even if you:
- Have never applied or experimented with textures for your clothing or props before
- Have never used Substance Painter
Without having to:
- Learn the deeper technical aspects of shaders
- Spend hours on adding little details (for example…stitching!)
3D Content Included in the Course:
- Esha's Adventure Hunter Outfit for Genesis 8 and 8.1 Females
- Adventure hunt props
Software Required to Follow this Course:
- Substance Painter: available on Steam as a one-off purchase or from Adobe on a monthly subscription. A 30-day trial is also available.
- Photoshop: used to create and tweak maps.
- Daz Studio: textured models in this course are shown and manipulated in Daz Studio as the target application.
Video Course
Includes over 12 hours of video content and searchable versions of the MP4 files.
Session 1:
- Introduction
- Shader basics
- How to use texture maps in a shader (example: Iray Uber Shader)
- Which materials are you likely to use in your work?
- Which maps will you need to create them?
Session 2:
- A few words regarding UV mapping with SP in mind:
- Projection vs UV space
- Planning for the final map
- Substance Painter Basics:
- Interface
- Basic settings
- Lighting and other controls
- Installing substances
- Sources for getting substances (other than Adobe)
Session 3:
- Preparing the Mesh:
- Groups and surfaces
- “Pose”
- HD mesh
- Triangulated mesh
- Setting up a project in SP
- Baking maps
- Getting materials onto the mesh (2 methods)
- Advantages of using layers with masks
- Creating more complex masks in a 2D program
Session 4:
- Importing mask files into SP
- Other auxiliary maps for details
- Using generators for special effects
- Using “anchors”
- Tweaking the generated effects
Session 5:
- Adding irregularities and subtle variations
- Tweaking colors (3 ways)
- Exporting the maps and plugging them into the Iray Uber shader
- Establishing a naming convention
- Creating extra maps for overlays
Session 6:
- Texturing clothing: applying the techniques we have discussed so far
- Sewing and embroidery:
- Painting stiches in Photoshop
- Customizable layer setup in Substance Painter
- Combining substances and merchant resources:
- Using imported color maps
- Preparing special patterns/prints/borders in Photoshop (smart objects and warp tool)
Session 7:
- Special considerations regarding dirt and discoloring on clothing
- Opacity maps (sheer fabric and lace)
- Using the features of the Iray Uber shader:
- Silk/Satin
- Special effects (e.g. Metallic Flakes)
Session 8:
- Special effects, including particle effects
- Final Q and A from students
- Student projects and course review
Searchable Video Sample (5 minutes)
About the Presenter: Esha
Esha lives in Austria and has been creating 3D products for nearly 15 years!
In the past, she has created content for Smith Micro and now for Daz 3D, being one of the leading vendors at daz3d.com.
Esha's favorite tools include Daz Studio, Poser, ZBrush, Wings3D, Xfrog, Marvelous Designer, UVLayout, Substance Painter, and Photoshop. In all of these, she is a self-taught artist, basing her skills on years of experience with building 3D content.
Esha also has several years of experience in teaching adults. She firmly believes that the best way to learn is to actively do something yourself, so she favors a hands-on approach in teaching.
Knowing only too well how tiresome it is to gather scraps of information all over the web, she wants to provide comprehensive content that really offers solid information. Moving from the basics to advanced procedures, she takes care to make sure that her audience will be able to follow her courses smoothly.
In her spare time, Esha loves listening to classical music, baking muffins, and collecting cat photos.
What's Included and Features
- Texturing Clothing and Props Expert Guide: Tutorial Course: (.DUF)
- Props:
- Astrolabe NoTex
- Chest NoTex:
- Hide Platform
- Open Lid
- Platform Up
- Codebox NoTex:
- Hide Code Controls
- Hide Deco
- Hide Feet
- Open Drawer
- Retract Controls
- Rotate Control 1-4
- Compass NoTex:
- Open Lid
- Rotate Needle
- Crystal NoTex
- Key NoTex
- Pomander NoTex:
- Bend
- Twist
- Side-Side
- Bottom Style
- Open All
- Top Style
- Sundial NoTex:
- Fold Up
- Wearables:
- Belt
- Boots
- Coat
- Pants
- Shirt
- Supported Shapes:
- Breasts Diameter
- Breasts Gone
- Breasts Heavy
- Breasts Shape 01-08
- Breasts Size
- Breasts Small
- Other Shapes may be supported in Daz Studio by Auto-follow
- Texturing Clothing and Props Expert Guide: Tutorial Course
- Total Running Time:
- 12 hours, 22 minutes
- Total Filesize:
- 5.67 GB
- Video 1: 1 hour and 33 minutes (.MP4)
- 00:30 Plug in the normal map
- 00:34 About PBR materials
- 00:36 The PBR/ specular/glossiness workflow
- 00:37 Substance painter prefers the Metallically/Roughness workflow
- 00:40 SP doesn't have a channel for mentality flakes - but you can plan for this
- 00:44 UV mapping explained
- 00:47 What is a UV map?
- 00:48 Simple example of UV mapping
- 00:50 More complex example UV map - 3D chest
- 00:53 UDIM: UV islands - what happens if you run out of room?
- 00:57 How Substance Painter handles UDIMS and what to expect
- 00:58 Loading Substance Painter
- 01:00 Texture sets in SP
- 01:11 SP - setting it up for use
- 01:15 About the SP library locations
- 01:20 Load object
- 01:29 Homework assignment
- Video 2: 1 hour 38 minutes (.MP4)
- 00:08 Usage of substances from the SP library - terms of use
- 00:10 Sources for substances including Art Station
- 00:14 Edit->Settings - library locations
- 00:17 Adding new substances
- 00:18 The shelf: Managing materials and smart materials
- 00:25 Loading an OBJ file: preparation steps
- 00:27 SP works better with triangulated objects
- 00:28 Chest object: Looking at the surfaces
- 00:31 Get rid of groups with empty polygons
- 00:33 Duplicate the chest object
- 00:34 Ensure object is high resolution using subdivision
- 00:36 Assign different colors to different surface groups.
- 00:38 Place all UV maps into one group. Rename surfaces
- 00:40 Questions on the model prep process
- 00:45 Export from DAZ Studio
- 00:48 New project in Substance Painter
- 00:51 Baking the object (bake mesh maps). Mesh maps created by SP - needed by SP
- 00:54 The normals may not be clean - fairly frequent problem - artifacts
- 00:56 Baking option provides a workaround.
- 01:01 Layers pallet
- 01:05 Texture scaling
- 01:12 Layer controls
- 01:16 Switch view to base color to check the material.
- 01:17 How different is the render in DAZ studio with the material compared in SP? It is darker in SP and brighter in DS.
- 01:19 Place a greyish color onto the base color to make it darker
- 01:25 ID mask
- 01:29 Masking
- 01:34 Haunt's questions
- 01:37 Homework assignment
- Video 3: 1 hour 32 minutes (.MP4)
- 00:00 Intro to session
- 00:05 Review of loading the content.
- 00:08 Haunt's questions on content library folders
- 00:10 How to add detailing/engraving to the metal
- 00:14 In SP: Using height
- 00:16 Using a brush.
- 00:18 Positive and negative values for the engraving.
- 00:19 Mirroring with the brush (symmetry)
- 00:22 Layers for the mask
- 00:23 Using fonts for the engraving.
- 00:25 Higher texture resolution in the preview.
- 00:28 Blending mode: multiply
- 00:31 Blending options similar to Photoshop
- 00:34 UV template for guidance on adding decorations.
- 00:42 Using a 4K map
- 00:48 Questions on painting on a UV map\
- 00:51 What about distortion? Eg painting on a sphere?
- 00:56 In Photoshop working on a map - color depth
- 00:59 Import map resource
- 01:00 Intensity and direction of the displacement
- 01:03 Careful to not import the UV map reference lines!
- 01:04 How to move maps/scale maps in SP
- 01:07 Repeat or not repeat map?
- 01:10 Ornament 2: imported
- 01:12 Overlap of imported layers - change the blending mode: use “difference”
- 01:15 Disadvantages of stamps vs mirroring - can't scale or rotate.
- 01:19 Free fonts - no strings attached (FontSpace) for commercial use
- 01:23 Import free for use fonts - can get access to the control points
- 01:26 Normal map converter “NormalMapOnline”
- Video 4: 1 hour 26 minutes (.MP4)
- 00:05 Start
- 00:18 Examining projections on a cube. The pattern is cut off on the edges (eg marble)
- 00:23 When slightly off the center - it projects to one side. Different options in the properties tab
- 00:26 Projections for different shapes, such as a cylinder
- 00:28 Using masks
- 00:29 Disabling ink on latest Windows update
- 00:30 Question on how SP can try to texture cavities in a model
- 00:33 Tessalation -> subdivision count slider00:35 If you have a complex prop with a lot of geometry - be careful with too high subdivision - it could freeze your machine
- 00:37 Back to the adventure chest prop
- 00:39 Thinking about the grain
- 00:42 Using a mask to implant grain patterns. Mask tricks
- 00:45 Question: the white where the edges meet is not exactly masking?
- 00:46 Question: For creating the mask, you used a square, and there was the pen tool. Is there a lasso or freeform selection tool for the mask of the UV?
- 00:51 Materials and seams - how to add. Covers mismatch of textures between prop parts.
- 00:57 Cracks in wood
- 00:58 Add another layer - ambient occlusion map
- 01:04 Lift the rings
- 01:06 Project configuration -> low-resolution version (preserve strokes positions on mesh)
- 01:08 Ambient occlusion map updated
- 01:12 Changing the lid of the chest to a glass material
- 01:14 Would it be possible to simply mask out the ring shadow from the ambient occlusion?
- 01:15 Adding some dirt to the chest
- 01:20 Parameters for dirt generator
- 01:23 One anchor per generator
- 01:26 Question on the random button
- 01:29 If you wanted to add the same grunge to different models, how would you do it?
- 01:32 Homework assignment: play with generators - > play with different types of dirt.
- Video 5: 1 hour 32 minutes (.MP4)
- 00:03 Variations for base textures
- 00:05 Creating a cloudy layer
- 00:09 Add a black mask for a fill layer
- 00:09 CTRL D to duplicate layer
- 00:17 Color perceptive settings - trying effects on a wooden chest
- 00:19 Hide/show adjustment filter
- 00:21 Colour adjustment for metal
- 00:24 Add a layer at the top of the stack to affect all of the materials on the chest
- 00:27 How to export texture settings. Select what will be exported.
- 00:32 Output template
- 00:33 Recommended settings
- 00:36 Export setting to avoid white seams
- 00:40 Naming conventions of templates should be considered
- 00:43 Esha's naming convention for her products
- 00:46 White metallic maps.
- 00:47 In DS - applying saved maps
- 00:49 The textures look too glossy.
- 00:50 Turn up metallicity in DAZ
- 00:51 Question on glossy reflectivity
- 00:57 Chest looks waxier in DAZ Studio - less contrast. Sabine recommends how to overcome that.
- 00:59 Plug the base Colour map into translucency?
- 01:00 Rule of thumb imagining thin materials.
- 01:02 Add special effects - eg dust
- 01:06 Dust maps
- 01:07 Use of a diffuse overlay for dust/dirt
- 01:09 Why didn't the dust/dirt appear on the metallic materials?
- 01:10 About clothing: seaming and stitching
- 01:13 Seam lines and stitches. not every seam needs stitches
- 01:14 Setting up clothing in DAZ Studio
- 01:16 Export from DAZ
- 01:17 Bake mesh maps
- 01:21 Looking at the clothing UV template
- 01:23 Editing the map in PS
- 01:25 Export and then import into SP
- 01:29 H/Wk - final texture for one object/export/naming convention
- Video 6: 1 hour 41 minutes (.mp4)
- 00:00 Introduction
- 00:06 New layer - Inverse - add a stroke
- 00:08 Load in SP - see the UV maps with cuts, like shadows of seam lines.
- 00:11 Two ways to create stitches. In PS or in SP.
- 00:12 Add a simple layer to create a brush for stitches.
- 00:14 Painting stitches in SP
- 00:17 You can't change the stitches after you paint them in SP
- 00:21 Making stitches in PS.
- 00:23 Brush options in PS
- 00:26 Stroke path -> Brush
- 00:29 Easy to change in PS the stitches
- 00:31 Questions on Creating brushes, creating wrinkles and
- 00:45 Sabine answers the question: “couldn't one create a normal map in Photoshop with the stitches that have been
- created and then import that into SP?”
- 00:55 Patterns and textures for clothes.
- 00:59 Better to have a color texture without any structure baked in.
- 01:00 Plugging in textures on a texture, projection of UV projection (fill properties)
- 01:01 Example of plaid patterns - distortion and misalignment
- 01:04 Working on an ethnic texture. Convert to smart object in PS.
- 01:08 Puppet warp on ethnic texture.
- 01:11 New method in SP which has similar tools and allows placement of the pattern. Similar tools to move and warp projection - it is for 2D imported resources.
- 01:14 Edit warp as a whole (SP).
- 01:18 Add a black mask to rid an overflow.
- 01:21 Working on the back pattern using the same methods.
- 01:24 Logo file - warp projection. Distortion problem.
- 01:27 Solve it by adding as a mask.
- Video 7: 1 hour 28 minutes (.mp4)
- 00:00 Example of class members works in progress
- 00:09 Smart objects in PS
- 00:11 New smart object via copy
- 00:12 Exchanging for texture variation
- 00:13 Question from Ted: - Is there a way to create a greyscale and include height information?
- 00:15 Making the border of the strip metallic.
- 00:18 Adjusting the height
- 00:20 Opacity /transparency
- 00:25 Lace material - adding to the shirt
- 00:27 Use a smart object and transform the lace to adjust the shape
- 00:29 Add the opacity map
- 00:32 Change the color of the lace
- 00:48 Load shirt in DS and load the textures
- 00:49 Can see that more clean up is needed on the normals
- 00:54 Creating satin or silk.
- 00:59 Test renders needed to find the best combination for a satin material
- 01:02 How would you make changes to fabrics? They look green from one side and red from another angle (for example)
- 01:07 In the preview it doesn't make much sense.
- 01:15 Showing the metallic band in DS
- 01:17 How to add discoloration and dirt to clothing
- 01:25 Boots and textures for laces
- 01:30 Homework - Play with opacity.
- Video 8: 1 hour 28 minutes (.mp4)
- 00:03 Special effects in SP
- 00:04 Particle effects only work on regular layers.
- 00:05 Rain
- 00:06 Sandstorm
- 00:08 Wind options / gravity effects on particles
- 00:12 Metallic flakes - decorative print on fabric
- 00:19 A question on fur
- 00:20 Frost tool
- 00:22 Gradient paint tool
- 00:26 Painting a zipper
- 00:29 Stitches
- 00:31 Save the top folder - it will save all the layers below.
- 00:34 Tree bark in SP is good but Sabine needed her own bark materials- sourced from Pixabay
- 00:40 In PS - make a tileable bark texture
- 01:15 Saving presets in DAZ Studio
- 01:15 Onwards: demo of some of the class projects and final Q&A
- Software Used:
- Substance Painter
- Photoshop
- Daz Studio
- File Types:
- Texturing Course Searchable Recordings Link (.PDF)
- OBJ
- DUF
- DSF
Compatible Figures:
Genesis 8 Female
Compatible Software:
Daz Studio 4.16
Install Types:
DazCentral, Daz Connect, DIM, Manual Install
