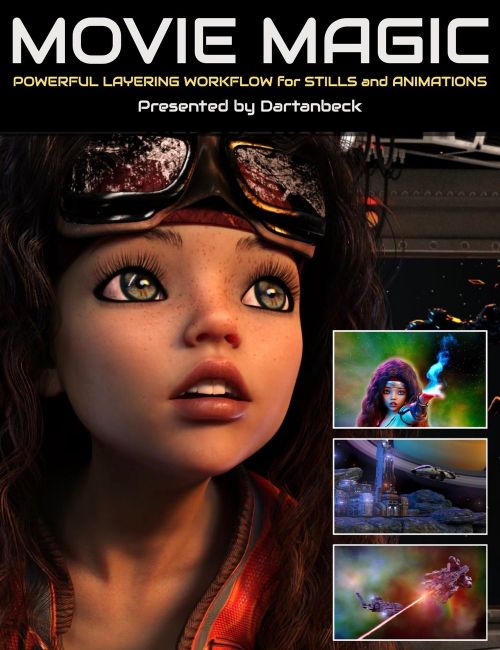
There are many ways to build, save, and render our Daz 3D scenes.
In Movie Magic, we; 'll explore workflows for creating specific, separate renders that are purposely made to be melded together into a single, final image.
Whether you're making still images OR animations, these practices add Magic by allowing us total freedom over the look of every element within the scene.
You'll see how much faster we can work - how much more we can get done with an efficient workflow.
The additional tools and elements demonstrated are not essential to the course but are shown to inspire creativity in using them. The main things that we will take away from all of this can be achieved with your library of content assets.
With Character Art being the main focus, we'll:
- Begin with a brief tour of such a workflow in action and demonstrate how many choices we have for the final result.
- Explore the possibilities gained from rendering our characters as individual elements.
- Explore various environments for our scene and discuss the possibilities they provide us as well as give us a complete idea of how our character should look.
- Start a library of Skies and other distant backing imagery.
- Create a collection of Foreground, Midground, and Background elements.
- Build layers of Foreground, Midground, and Background animations.
Build layers of Foreground, Midground, and Background animated effects.
- See how we can use our saved character animations for changing the lighting, camera angles, costumes, hair, and even the character itself.
....all the while working towards our final work - in our example, a short video.
In each topic, we delve into several aspects that are related, discussing various directions we can take and how they affect the rest of the topics in the workflow. So by the end, we'll have a cohesive set of assets - or layers if you will - that all work together to make our final image come to life with an abundance of possibilities!
In this mini-course, I will demonstrate character animation and show case studies, not the actual process of animation but what to do with the animated character after it's saved, and demonstrate how the same animation can be used for many purposes.
We'll take away from all of this to see a solid and powerful workflow for faster render times and a lot more creative power over the final result.
The examples in the post-production phase will be performed in DaVinci Resolve, but the same or similar steps will be used no matter the compositing software of choice.
Join me on a Journey of Unleashing You Creative Juices!
Software Used in this Tutorial Set:-
- DAZ Studio
- DaVinci Resolve (free)
Tutorial Set Format and Total Running Time:-
3 hours 16 minutes
MP4 videos at 2560 x 1440 resolution
This tutorial set is for you
- You're eager to learn workflows for creating separate renders in DAZ Studio that seamlessly merge into a final image or animation, enhancing the overall visual impact.
- You are looking for techniques to expedite your work process in DAZ Studio, achieving more with an efficient workflow, whether for still images or animations.
This is for you if you want to accomplish
- Mastering a workflow that offers total creative control over every element of the scene, from characters to environments, and understanding how to render these components as individual layers for a cohesive final result.
- Building a versatile library of assets, including skies, foreground, midground, and background elements, as well as animations and effects for different layers, to enrich your scenes.
- Gaining skills in manipulating saved character animations for various purposes, such as changing lighting, camera angles, and even the characters themselves, culminating in a final project like a short video.
- Additionally, learn to utilize post-production techniques in software like DaVinci Resolve to bring these elements together effectively.
About the presenter Dartanbeck
Dartanbeck began his Digital Art journey by painting game tiles for tabletop fantasy games. He then became a texture artist for 3d game characters for a worldwide gaming community from which he has received several Hall of Fame awards. This immediately sparked his desire to create digital animations in the form of movies or shorts and he has been dedicated to that pursuit ever since.
Now as a Daz 3d published artist, he has released several environment kits for Carrara software – specifically designed with animated movie makers in mind, plus released two character animation packs.
Dartanbeck is currently animating using Daz Studio and Carrara software and is having a lot of fun and success with it. Throughout his animation projects, he loves to share his experiences to help others succeed.
His animation workflow includes Daz Studio with a collection of add-on plugins, Carrara 8.5 Pro, PD Howler, Affinity Photo, DaVinci Resolve, HitFilm, and Magix MusicMaker Premium.
Dartanbeck lives in a small fishing city in Wisconsin, loves the changing seasons, and has always been at home in the wilderness. He has spent his career chiseling custom stonework, designing and building cliff extensions, waterfalls, ponds, walls, patios; even custom outdoor furniture made of stone. He is also a performing musician.
What's Included and Features
- Movie Magic : Powerful Layering Workflow for Stills and Animations
- Video 1a : 50 minutes (.MP4)
- 00:00 Introduction.
- 00:02 Discusses behind-the-scenes filmmaking influences on DAZ Studio. Begins workflow by focusing on animating water and removing static leaves.
- 00:04 Identifies the water's integrated shader and optimizes the scene by hiding non-animated elements to prepare for animated ocean water addition.
- 00:06 Covers the animation process for water, selecting appropriate motions and adjusting scale for a river look.
- 00:08 Demonstrates node instance creation for water animation, emphasizing precise alignment for a natural look and the advantages of instances.
- 00:10 Explains node instances' benefits, applies a river-appropriate shader, and prepares the scene for rendering with an organized approach.
- 00:12 Details render setup, folder organization, and adjustments for efficient looping animation and post-production setup with matte fog.
- 00:14 Introduces grass and meadow animation with the Philosopher's product, noting the time-saving advantage of separate element rendering.
- 00:16 Adjusts render settings for grass animation, demonstrates the quick rendering process, and shows the systematic approach to file management.
- 00:18 Focuses on tree animation for scene depth, selecting a suitable theme, and positioning as a foreground element with quick rendering.
- 00:20 Review the tree animation output, mentioning the setup for post-production blurring for depth of field effects.
- 00:22 Ends with animated clouds for atmospheric depth, showcasing animation speed control and shader variations for on-screen effects.
- 00:24 Discusses the animation of a bald eagle, emphasizing the value of the animation bundle purchased.
- 00:26 The importance of reflection in the water for realism and delves into the Iray reflection settings.
- 00:28 Animating HDRI lighting, grouping scene elements for cohesive rotation, and subtly changing lighting for dynamic effects.
- 00:30 The importance of the character as the focal point in scenes, allowing for creative liberties with realism and physics to enhance the visual storytelling.
- 00:32 Previews the use of DaVinci Resolve for compositing, emphasizing the ease of basic techniques used and showing the setup for adding various rendered elements to the scene.
- 00:34 Explains the non-destructive editing benefits in DaVinci Resolve, showcasing the process of assembling renders into a cohesive scene.
- 00:36 Covers the adjustment of sky elements in the composition, using transform tools in DaVinci Resolve and the idea to animate the sky for added effect.
- 00:38 Demonstrates the completion of a composited scene in DaVinci Resolve and discusses the benefit of having rendered elements as "paint brushes" for the canvas.
- 00:40 Highlights the artistic choice of contrast in renders and adjusts gamma in post to match the scene's misty environment.
- 00:42 Discusses the ease of using nodes in DaVinci Resolve's Fusion, copying and pasting node setups for efficient workflow.
- 00:44 Adjusts contrast on plant elements in the scene, discussing the impact of tone mapping settings on the cinematic look.
- 00:46 Outlines the process of merging elements and keyframing to seamlessly transition between animations in the composited scene.
- 00:48 Shows hand-animating a mask to simulate the shadow movement of a tree on the river, adding depth to the scene.
- 00:50 Concludes by illustrating the time efficiency and flexibility of rendering elements separately and assembling them in post-production.
- Video 1b : 43 minutes (.MP4)
- 00:00 Dartanbeck discusses the difference in rendering still images versus animations, opting for higher quality in stills and the shift from 720p to 1080p resolution for better detail.
- 00:02 Describes animating a starship door opening, where the animator can control the timing between frames, showing a 90-frame animation example.
- 00:04 Explains how to sequence the animation with the door opening and the importance of having other elements in motion, such as a walkway scene with characters.
- 00:06 Introduces a character with a sci-fi gadget and animates the speech using visemes for mouth shapes, enhancing the scene's dynamics with more action.
- 00:08 Discusses the Catcher Plus product, which allows for the exclusion of objects from rendering, making them transparent in Iray, and demonstrates its use with a starship model.
- 00:10 Shows how Catcher Plus creates a masking effect, allowing Rosie to emerge from the starship seamlessly, and discusses the creation and application of the OBJ export.
- 00:12 Demonstrates Rosie's step out of the starship with the Catcher Plus effect, noting the test render quality and the use of reduced geometry for webinar purposes.
- 00:14 Discusses positioning androids within the sci-fi scene for narrative purposes and hints at the need for another character to engage with Rosie.
- 00:16 Highlights the importance of scale in rendering characters to maintain quality when resizing and the need to be mindful of shadow edges in compositing.
- 00:18 Explores the features of the Shuttle Star model by Kibarreto, discussing the potential for customization and the importance of lighting for character visibility inside the ship.
- 00:20 Demonstrates how to customize the screens within the starship using texture maps and image editors, and discusses the use of emission settings for lighting effects.
- 00:22 Continues with the topic of masking using Catcher Plus, detailing the process of making Rosie emerge from the starship against a pre-rendered background.
- 00:24 Introduces a tool for creating windows in geometry, using Catcher Plus with a transparent and refractive glass plane to create a realistic window effect.
- 00:26 Demonstration of a window looking out onto a starry sky, illustrating the realistic appearance achieved by using Catcher Plus.
- Video 2 : 1 hour 43 minutes (.MP4)
- 00:00 Fascination with movie magic and behind-the-scenes work, which serves as entertainment and a learning source for them.
- 00:02 Discusses the importance of characters in movies and the practice of saving project files to allow for future edits, using Rosie who plays multiple roles.
- 00:04 Emphasizes the need to save animation work. A successful experiment with hair simulation and the importance of camera angle variation in action sequences.
- 00:06 Talks about starting animations with third-party aniBlocks. The benefit of reusing animations with different elements like costumes and hair to create varied content.
- 00:08 Shares an experience of using an animate parent constraint in an animation and the advantages of revisiting saved scenes to improve or repurpose them for different uses.
- 00:10 Discusses the process of setting up a scene for simulation, including configuring settings and addressing issues like collision and poke-through in animations.
- 00:12 Continues to detail the simulation setup, describing the use of memorized poses and the need to tweak settings based on the needs of the specific scene being worked on.
- 00:14 Explains a troubleshooting process for simulations when encountering problems like clothing blowing up due to collisions.
- 00:16 Describes how to correct simulation errors by adjusting keyframes and using the control keys to select and remove specific keyframes.
- 00:18 Talks about using morphs to fix poke-through issues in simulations and introduces the Mesh Grabber tool as a powerful method for mesh adjustments.
- 00:20 Explains the process of creating and using custom morph dials for fine-tuning simulations and the time-consuming but rewarding nature of visual effects work.
- 00:22 Addresses further simulation adjustments and the importance of saving scene iterations for future use or improvements.
- 00:24 Describes how to freeze simulations and adjust friction settings for hair and clothing to achieve more realistic interactions between elements.
- 00:26 File organization for renders and animations.
- 00:26 Discussion on challenges with hair simulation.
- 00:28 Techniques for adding dramatic effects to simulations are explained, such as giving hair a stylistic push for cinematic purposes.
- 00:30 The simulation process is sped up for efficiency. Using helpers like cones on the simulated hair to ensure correct movement within the scene.
- 00:32 Adjusting density settings in simulations to control how items like hair interact with other surfaces and the need for fine-tuning to achieve the desired effect.
- 00:34 The use of Mesh Grabber for detailed mesh editing is showcased, demonstrating how to fine-tune simulations.
- 00:36 Discusses saving the scene to flush out unused maps and introduces new facial adjustments specific to the character Rosie.
- 00:38 The presenter shares creating a unique facial expression for Rosie.
- 00:40 Focus shifts to setting up a scene in a Sci-Fi Corridor set, discussing foreground and background elements.
- 00:42 The use of Scene Optimizer to enhance render quality is covered, storing and reusing images and the potential for reusing elements in post-production.
- 00:44 The value of rendering elements like cables and other kit pieces to alpha for later use is highlighted, offering flexibility in post-production editing.
- 00:46 The process of revisiting saved files for improvement is discussed, as well as the benefits of collecting products like fit control and using them with gratitude.
- 00:48 The concept of in-place walk cycles is explained, describing how they don't physically move in 3D space, and the presenter shares personal preferences for animating walk cycles.
- 00:50 The importance of saving animations is reiterated, with the presenter advising on changing elements like costumes and facial expressions to extend the use of a single animation.
- 00:53 Uses a script to precisely position elements within a scene.
- 00:55 Joins multiple scene elements to create a cohesive environment - the importance of imperfection for realism.
- 00:57 Adjusts camera angles to optimize the view of the scene and prepares to render depth of field for added realism.
- 00:59 Utilizes the rule of thirds to strategically position characters and elements within the camera frame for visual impact.
- 01:01 Prepares to render character animations with adjusted settings to match the lighting of the scene.
- 01:03 Introduces a background actor using Genesis 3.
- 01:05 Equips a background character with a sci-fi hand gadget.
- 01:07 Fine-tunes the positioning of the character and prop, ensuring even distant elements have proper attention to detail.
- 01:07 Adjusts the HDR lighting settings to add more dynamic color to the scene and shows how a character can appear glued to a scene despite being rendered separately in alpha.
- 01:09 Discusses the concept of collecting digital content.
- 01:11 Demonstrates rendering skies using high-resolution HDRIs for backdrops and discusses the importance of a good sky collection.
- 01:13 Clears the scene to introduce a different sky system, showcasing the variety of skies available and the ease of rendering them for future use.
- 01:15 Explores a different approach to skies by using an urban future environment.
- 01:17 Suggests saving render presets for matte paintings.
- 01:19 Discusses using detailed environments like Stonemason's Urban Future as backdrops.
- 01:21 Introduces the concept of using animated clouds and other elements to hide imperfections in still renders of environments.
- 01:23 Emphasizes the importance of organizing renders and assets within a structured folder system.
- 01:25 Renders various foreground elements like plants and furniture separately.
- 01:27 Showcases how to render props for use as foreground elements, providing tips on how to optimize the render process for efficiency.
- 01:29 Renders an army bunker environment, discussing how to strategically render and organize elements for use in different layers of a scene.
- 01:31 Continues discussing the importance of rendering elements separately for compositing. Tip on faster rendering for environments.
- 01:33 Explains the file organization workflow, detailing how to categorize and store rendered images and animations for easy retrieval.
- 01:35 Suggests specific folder structures for characters and environments, highlighting the importance of consistent naming for files and sequences.
- 01:39 Elaborates on the benefits of rendering separate elements rather than complete scenes.
- 01:41 Demonstrates how rendering individual elements like a single animal can be efficient and provide versatile assets for various scenes.
- 01:43 Conclusion.
Install Types:
DazCentral, DIM, Manual Install
