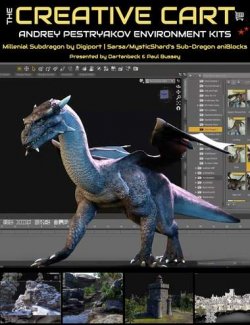
This is over six hours of tutorials in taking an existing popular dragon model and learning how to re-engineer it. Discover how to add morphs and alter the detailing and colouring using ZBrush. It's a comprehensive project in how to create new morphs to alter a model, use secondary sculpting for detailing and then creating texture maps and colouring to give a brand new look and feel to the model. These tutorials were a live webinar class recorded in full HD and presented by master sculptor John Haverkamp.
Requirements
You'll need ZBrush (4R7 was used) to follow along with these tutorials and to have a basic to intermediate knowledge of this software. When showing how to prepare and edit the texture maps in this guide, we used Photoshop.
You'll Learn
1. A complete tour of the Daz Dragon 3.
2. An examination of dragon anatomy using geometrically simplified forms.
3. A comprehensive step-by-step guide for building morphs for iterative designs of Dragon
4. Learn the secrets of iterative design. How to generate "happy accidents" and variants of Daz Dragon 3 that can be sold in the Daz 3D store
5. Painting and texturing your dragon.
6. Getting it all working in an Iray shader in Daz
What's Included and Features
- Session 1 - Dragon Tour:
- 1. A complete tour of the DAZ 3 dragon. The geometry is the form. How to use the base topology to your complete advantage.
- 2. An examination of the simplified form dragon. Considering the form and anatomy to build the skills for creating realistic fantasy anatomy with appealing design variations.
- 3. A comprehensive and step-by-step guide for building morphs for iterative designs of Dragon 3. This includes resizing limbs and wings, reshaping the head and adding horns.
- 4. We go through some of the secrets of iterative design. How to generate 'happy accidents' and variants of the Daz 3 Dragon by adding morphs. You'll learn how to make morphs created in ZBrush to work for you in Daz Studio.
- Session 2 - Re-engineering with Morphs:
- 1. Using GoZ to transfer the changes to back to DAZ
- 2. Adjusting morph properties and ranges in DAZ
- 3. Iterating with multiple morphs to find a 'sweet' design
- 4. Consolidating many morphs into a single morph dial.
- Session 3 - Secondary Sculpt Pass for Better Texturing:
- Since the primary forms are potentially changed dramatically from the base Dragon 3, a new texture set is recommended for each major Morph Variation! To start this process, the mesh is sub-divided in Zbrush and an overall secondary sculpt pass is applied BEFORE the alpha detailing. Think of this as the 3D under-painting that sets up the final detail. Without a good secondary pass, alphas details often look generic or even fake.
- 1. Skin wrinkles, muscle and fat anatomy details.:
- a. Wrinkle theory, cutting in with the dam standard brush
- b. Inflation, brush passes the influence of fat and gravity
- c. Standard and clay brush, uses for reinforcing both wrinkles and fat details.
- d. Starting to build scale details by hand.
- e. Developing a flow or rhythm that introduces randomness for a natural 'feel'.
- 2. Original Alpha creation:
- a. Getting legal photo reference and preparing it in Photoshop
- b. Sculpting texture details from scratch on a plane in Zbrush
- c. Making tilable textures in Photoshop and Zbrush
- d. Making 'hero' detail patches
- 3. Using Alpha's with layers:
- a. Morph targets and morph brush options
- b. Layer mixing
- c. Customizing brushes
- 4. Reinforcing the Alpha details pass with manual sculpting:
- a. Rinse and repeat until finished!
- Session 4 - Colouring your Dragon:
- 1. Painting the Diffuse layer:
- a. color theory
- b. using the mask menu to assist with color painting
- c. spray and color spray brushes
- 2. Map Extraction:
- a. Normal
- d. Displacement
- c. Diffuse
- d. Ambient Occlusion
- c. Cavity
- e. Metal, Rough, or Spec and Glossy, the differences and how to use the mask menu in zbrush plus adjustments photoshop to build them
- 3. Getting it all working in an Iray shader in Daz
- a. importing the maps to the right slots
- b. playing with settings and options
- 1. Painting the Diffuse layer:
- Bonus Session:
- How to create luminous detailing/coloring.
Notes
- This product includes:
- 5 General Installers
Compatible Figures:
No
Compatible Software:
Install Types:
Install Manager Manual Install

