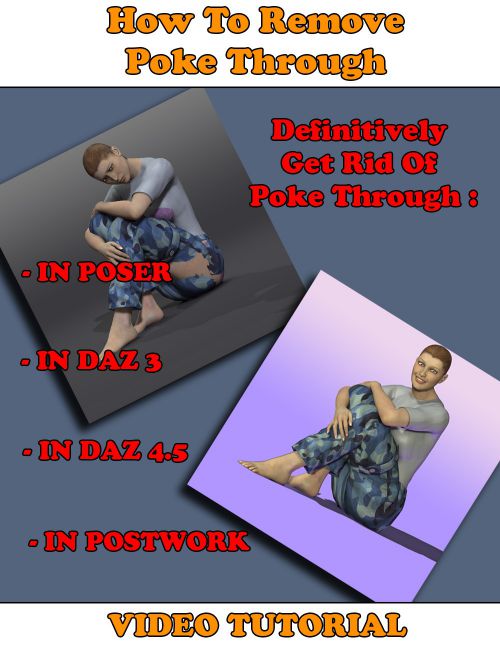
How many of you have already found the perfect shape, the perfect pose, the perfect lights and camera frame for a character, and suddenly, everything is compromised by a poke through in the outfit? You know, when the figure you're using "pokes" above its outfit. I think I could say all of you have probably experienced this dilemma.
There are many solutions to this problem.
The goal of this tutorial is to explain the many tools you have how to solve this problem, working on a concrete example and using various techniques.
This tutorial is divided in four video tutorials (resolution 1280x720). One for Poser users, one for DAZ Studio 3 users, one for DAZ Studio 4.5 users and the last tutorial for all users since it describes how to remove your poke through once your image is calculated, using postwork in a 2D software.
In all the tutorials, except Postwork, you will find the methods common to Poser and DAZ Studio including, how to :
- Use node properties
- Create and apply opacity/transparency maps
- Use magnets/deformers, and spawn them (only in DAZ Studio 3 and 4.5 Tutorials) as morphs
In the Poser Tutorial you will also find more specifically how to solve poke through using:
- The morphing tools included in Poser (Poser 7 and above)
- The new morphing tools included in Poser Pro 2014
- The ZBrush Goz in order to morph outfits
- Blender, a free 3D graphic design software in order to repair the geometries (useful for Poser versions older than Poser 7)
In the DAZ Studio 3 Tutorial you will also find specific solutions to solve poke through using:
- Blender, a free 3D Software, and the morph loader to create a morph on your Posed Figure or on your Zero Figuro, and the consequences of your choice.
In the DAZ Studio 4.5 Tutorial you will also find specific solutions to solve poke through using :
- The Smoothing Modifier and the Transfer Active Morph tools
- Blender and the Morph Loader Pro to Create Morphs
- The ZBrush Goz to Create Morphs
With all these tools, you will quickly be able to remove all poke through from your scenes - whatever the poke through you have and whatever the software you use!
- Notes
-
- This product includes:
- 2 General Installers
- This product includes:
- Compatible 3D Figures
- N/A
- Compatible 3D Software
- What's Included & Features
-
- Five Video Tutorials in .MP4 format
- Video 1 : Introduction, Length : 3 Minutes (.MP4)
- Video 2 : Poser Users, Length: 1 Hour and 21 Minutes (.MP4)
- Hiding Character Body Parts
- Hide Selected Areas Using Opacity Maps
- Create A Morph Directly In Poser Using The Brush Morphing Tools (Poser 7+)
- Create A Morph Directly In Poser Using The NEW PP 2014 Brush Morphing Tools
- Create A Morph In Poser Using The ZBrush GOZ (PP 2012)
- Repairing Geometries Using Blender
- Using Magnets To Repair The Poke Through (Poser 4+)
- This Video Also Includes How to Save Your Morphed Outfits For ReUse
- Video 3 : DAZ Studio 3 Users, Length: 57 Minutes (.MP4)
- Hiding Character Body Parts
- Hide Selected Areas Using Opacity Maps
- Create a Morph in Blender on a Posed Figure
- Create a Morph in Blender on a Zero Figure
- Create a Morph in DAZ Studio 3 Using the Deformer Tool
- Video 4 : DAZ Studio 4 Users, Length: 1 Hour and 37 Minutes (.MP4)
- Hiding Body Parts
- Hide Selected Areas Using Opacity Maps
- Use The Smoothing Modifier
- Use The Transfer Active Morphs Tool And Combine it With Smoothing
- Create Morphs Using Blender
- Create Morphs Using ZBrush
- Create a Morph In DAZ 4 Using the Deformer Tool
- This Video Also Includes How to Save Your Morphed Outfits For ReUse, Both For Generation 4 Outfits (.CR2) and for Genesis Outfits (.DUF)
- Video 5 : Post-Work An Image, Length: 1 Hour and 25 Minutes (.MP4)
- 2D Software
- Repair Small and Medium Areas
- Repair Very Large Areas
