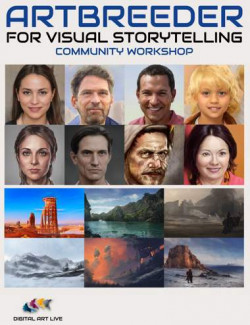
Artbreeder is a free must-have resource for rapidly generating absolutely unique characters.
What if you could take Artbreeder 2D characters to create 3D character models in DAZ Studio?
You would have an unlimited selection of brand new characters to try in your DAZ Studio scenes!
John Haverkamp has refined a workflow to do just this. You can learn how this works step by step in this tutorial set.
There is a hybrid software approach to this, with all of these applications free to try.
- Artbreeder for rapid generation of the concept character
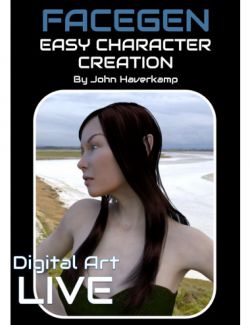
- Facegen (demo software is free) to create the custom 3D mesh and UV layout
- DAZ Studio - Load the mesh into DAZ Studio allowing a bridge to ZBrush
- Zbrush or ZBrush Core (trial for free for 30 days) for polypaint and normal map generation
- GIMP (or PS) for map blending and adjustment.
Total Tutorial Set Running Time : 5 hours and 9 minutes
Tutorial Set Content
Essentials in face structure and sculptural forms
- The Skull
- Muscles
- Eyes
- Mouth
- Fat
- Skin Pores and Wrinkles
- Male, Female, and Ethnic Differences
Artbreeder
- Best practices for picking Artbreeder images
- Provisos for selecting Artbreeder image
- High resolution export (ideal)
Facegen
- Attention to profile view : adjustments required
- Adjust demographic sliders if needed
- Play with the color
- Adjust the final map ready for export
DAZ Studio
- Blend multiple Facegen results : to get the result you want (blending the morphs)
- Cleaning multiple morph inputs via Morph Loader Pro
ZBrush
- Adjusting and fine tuning the morph
- Special attention in fixing issues on the eyes
- Fibremesh or Sculpt eyebrows
- Polygrouping for isolating UV zones.
- Subdividing the Zbrush model
- Polypainting
- Skin pore painting : base pass using the color map from Facegen.
- Skin pore painting : skin pore hand painting strategies
- Normal map export
- Diffuse map export
Photoshop
- Fixing and blending the maps
Rinse and Repeat DAZ Studio <-> ZBrush <-> Photoshop
Supplemental Tutorials
- Custom Zbrush alphas
- Fibremesh eyebrows
- Glossy weight maps
- Scarring for skin
- Translucency maps
About John Haverkamp
John Haverkamp was born in Ohio and then moved to the pristine Blue Ridge Mountains of Virginia at a young age. There he spent a semi-isolated childhood re-enacting the Lord of the Rings and being corrupted by Dungeons and Dragons. Always with the fondness for the fantastical and medieval, Art school drove him deeper into Luddite territory by granting him the skills of a traditional metal-smith. This meant post-college jobs making copper fountains, welding and steel fabricating, casting and finishing bronze sculptures, and working for an architectural blacksmith throughout his twenties.
Digitally, John got sucked into cyberspace and the arcane mysteries of 3D studio max. The perfect software match for John was Zbrush discovered six years ago. Now he teaches digital arts part time, and constantly endeavours to improve his craft as a digital-sculptor and visualizer through personal work, illustration and indie game projects.
What's Included and Features
- Prototyping: Unlimited Character Development for DAZ Studio
- Main tutorials : 3 hours and 51 minutes
- First Main Session
- (First 30 minutes covers the first half of the pipeline)
- 00:02 Artbreeder face needs to be directly towards camera
- 00:05 Avoid hard contrasting light
- 00:10 Calibrating Artbreeder image in Facegen
- 00:15 Check side face profile in Artbreeder
- 00:20 Facegen steps and recommendations for transfer into DS
- 00:25 About the use of ZBrush core in the workflow
- 00:30 In ZBrush - isolating the poly group.
- 00:35 Being informed on anatomy throughout the sculpt: ZBrush skeleton and muscle groups model
- 00:40 ZBrush : Polypainting
- 00:45 ZBrush : face anatomy
- 00:50 ZBrush : Details between the mouth and nose.
- 00:55 ZBrush : Attention to the details
- 01:00 ZBrush : Inner eyelid
- 01:05 ZBrush : Corner of the eye
- 01:10 ZBrush : Lower eyelid
- 01:17 ZBrush : Thickness of upper eyelid
- 01:25 In DAZ Studio
- 01:26 About symmetry and asymmetry
- 01:35 Gender/ethnic variations in the skull
- 01:40 Primary forms rather than details
- 01:43 Faces and perspective when comparing with reference photos
- 01:50 Class challenge
- Second Main Session
- 00:02 Picking a second character from Artbreeder
- 00:05 Facegen profile check. What is most important to check?
- 00:10 Import second character into DAZ
- 00:15 Import into ZBrush via bridge
- 00:20 Zbrush : hot keys for main brushes
- 00:25 ZBrush : 1st pass of the skin detailing
- 00:30 ZBrush : Subdivision
- 00:35 ZBrush : Adding mass to the face with the 3rd level of subdivision
- 00:40 ZBrush : lower lip
- 00:45 ZBrush : Adding mass to the nose and symmetry problem
- 00:50 ZBrush : Dam standard brush above the eye
- 00:55 ZBrush : Smoothing
- 01:00 Apply Facegen texture onto ZBrush as a test
- 01:05 Zbrush : Polypainting recommendations for the brush and colouring
- 01:10 ZBrush : Blood vessels and colouring to the face : PBR
- 01:15 ZBrush : Morph brush - painting out
- 01:20 ZBrush : Masking and clay build up from the map
- 01:25 ZBrush : Definition of the Alpha map
- 01:30 ZBrush : Skin pore detailing
- 01:38 ZBrush : Baking the layers together
- 01:45 Back in DAZ Studio : results so far with detailing
- 01:50 ZBrush : Detailing with shadowing on the face
- 01:55 DAZ Studio : Mixing morphs from different character
- 02:00 About ZBrush core
- Supplemental tutorials : 1 hour 16 minutes
- Custom Zbrush alphas
- Fibremesh eyebrows
- Glossy weight maps
- Scarring for skin
- Translucency maps
Install Types:
DIM, Manual Install