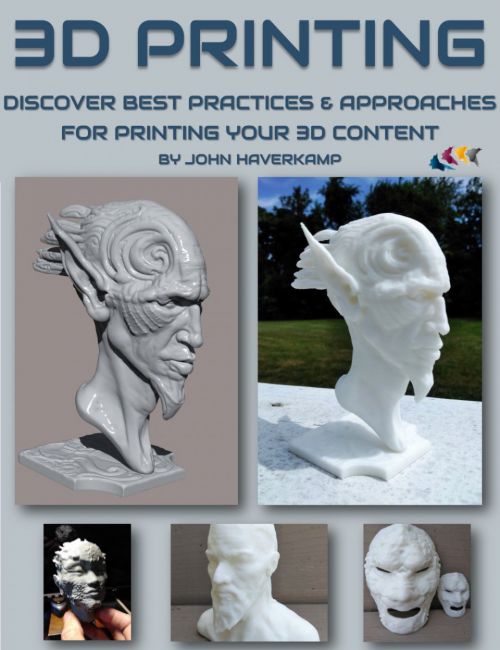
What is 3D printing? How does it work? What are its key benefits if you craft your own 3D digital models?
The concept of 3D printing can be traced back to when the sci-fi author, Arthur C. Clarke, was the first to describe the basic functions of a 3D printer in 1964. The first actual 3D printer appeared in 1987, where there was a view to using them in industry for design prototyping. Fast forward to today and you can get hold of a personal 3D printer at just a few hundred dollars.
This tutorial is for digital artists that are curious about 3D printing and how it may apply to them. John Haverkamp shows you why he took up 3D printing, how a 3D printer works, how to prepare a 3D model for printing, making the best use of a personal 3D printer and the typical "postwork"required on a 3D printed model. He'll even show how a model with ball and socket joints can be taken through the process. The session includes a webcam feed of John Haverkamp's studio as he shows you the Creality CR-10 Mini printer, the models he's created, the clean up and painting processes.
Software used in this workshop: ZBrush and the open source software Ultimaker Cura (for 3D printing).
Why 3D Printing?
- John's story of why he took up 3D printing
- The benefits of 3D printing for the digital artist
- How fast is 3D printing?
- Why John selected the Creality CR-10 mini
ZBrush Mesh Preparation
- Airtight mesh
- Eliminating thin parts
- Flat bottoms
- Separating into multiple meshes and creating keys so they snap together
- Simple ball and socket joint for action figures
Printing with the Creality CR-10 Mini
- Filament types PLA vs ABS
- Using the Creality CR-10 Mini
- Ultimaker Cura settings
- Mesh Alignment considerations
Cleanup
- Removing supports
- Gluing
- File and Rotary tools refinement
Painting
- Priming
- Dry-brushing
- Model paints and inks
- Metallic paint additives
About John Haverkamp
John Haverkamp was born in Ohio and then moved to the pristine Blue Ridge Mountains of Virginia at a young age. There he spent a semi-isolated childhood re-enacting the Lord of the Rings and being corrupted by Dungeons and Dragons. Always with the fondness for the fantastical and medieval, Art school drove him deeper into Luddite territory by granting him the skills of a traditional metal-smith. This meant post-college jobs making copper fountains, welding and steel fabricating, casting and finishing bronze sculptures, and working for an architectural blacksmith throughout his twenties.
Digitally, John got sucked into cyberspace and the arcane mysteries of 3D studio max. The perfect software match for John was Zbrush discovered six years ago. Now he teaches digital arts part time, and constantly endeavours to improve his craft as a digital-sculptor and visualizer through personal work, illustration and indie game projects.
What's Included and Features
- 3D Printing: Best Practices and Approaches
- Main tutorial: 1 hour and 45 minutes (.MP4)
- 00:01 Creality CR-10 mini printer
- 00:02 Looking at a model just printed
- 00:05 The heated printer base. Artifacts on a 3D printed model
- 00:10 Scaffolding for models
- 00:13 Printed dragon head. How scaffolding is determined for models
- 00:15 Introducing the Cura software - prepping the virtual model for printing
- 00:20 Cura settings
- 00:25 Can the external environment affect the printing (eg vibration?)
- 00:28 Basic settings for Cura
- 00:30 Raft base
- 00:35 Importance of the orientation of a model in Cura
- 00:40 Resin vs Filament printers
- 00:45 Filament ranges
- 00:50 Rigged models: ball joints
- 00:55 Preparing a DAZ figure in ZBrush for personal printing
- 01:00 Prepping the hair on a model
- 01:05 Dealing with the eyes and eyebrows
- 01:10 Considering the base of the model or standing the model
- 01:15 Preparing clothing or other 2D surfaces in ZBrush
- 01:20 Printing model parts with pin joints
- 01:25 Prepping thinner parts of the model
- 01:30 Creating keys for snapping model parts together
- 01:35 Painting a model
- 01:40 Paint thickness
- 01:45 Selection of John’s models shown on webcam
- Supplemental tutorials on postwork and 3D model painting: 9 videos lasting 1 hour and 17 minutes (.MP4)
- 03 Painting Videos
- 04 Post Work Videos
- Artifacts Video
- Removing from Base
Compatible Software:
-empty-
Install Types:
Install Manager, Manual Install
